When two kids share one room, the real challenge isn’t just space. It’s harmony. Here’s how to make it work beautifully.
Sharing a bedroom is a rite of passage for many siblings. Done right, it builds lifelong bonds, teaches compromise, and honestly? Creates some of the most charming, creative interiors in the home. Done poorly, it becomes a daily battleground over toys, territory, and the nightlight.
The good news is that with the right layout, storage systems, and a few personalization tricks, a shared kids room can be both wildly organized and genuinely fun to be in. Here are 23 ideas to make it happen.
Sleeping Arrangements That Work Smarter
1. Go Vertical With Bunk Beds
Bunk beds are the undisputed champions of shared rooms. They reclaim precious floor space while giving each child their own defined sleep zone. One up top, one below, no territorial disputes. Look for models with built-in drawers or pull-out trundle options underneath for even more functionality.
The key is choosing a frame that grows with your kids. A quality bunk bed with safety rails, sturdy ladder grips, and adjustable configurations will serve you well for years. Pair it with individual reading lights on each level so both children feel like they have their own private little world at bedtime.
2. Try An L-shaped Bed Layout
Instead of stacking or placing beds side by side, arrange them in an “L” along two adjacent walls. This surprisingly effective layout opens up the center of the room for a dedicated play area and creates a natural sense of separation without building any kind of physical divider.
It works especially well in square-shaped rooms where the corner real estate is otherwise wasted. Add a small rug in the open center, a few floor cushions, and you have instantly created a play zone that both kids share and a sleep zone that each child claims as their own.
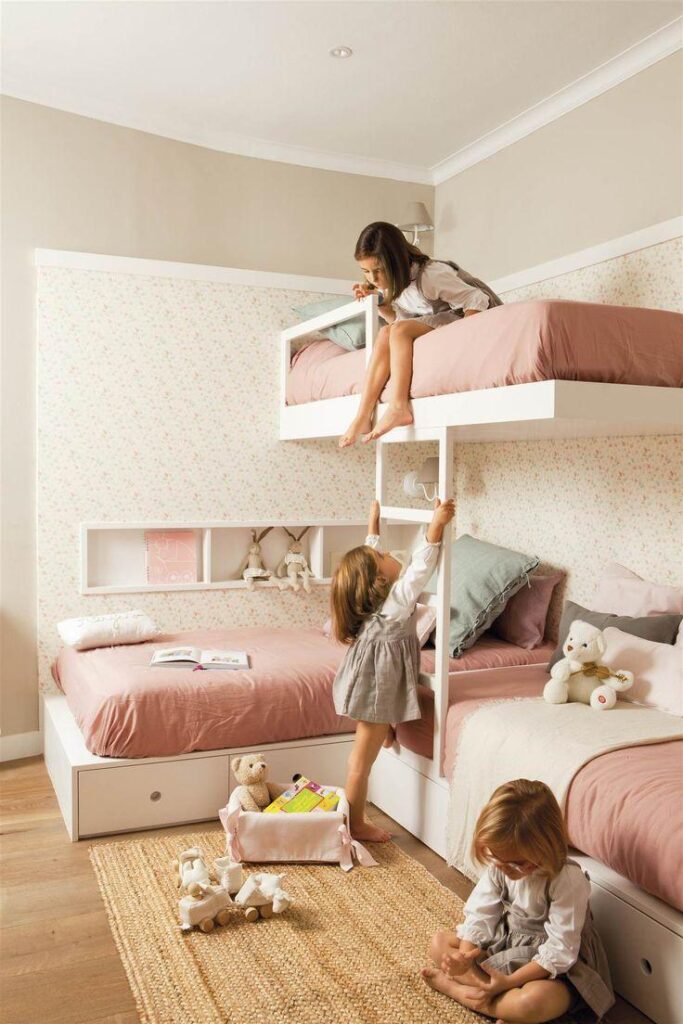
3. Use A Loft Bed With A Purpose-built Nook
Raising one child’s bed and tucking a desk, reading corner, or mini playhouse underneath is one of the smartest space moves you can make in a shared room. You are essentially turning one footprint into two fully functional zones, and kids absolutely love the novelty of a house within a room.
For a toddler and older sibling combo, consider putting the older child on top and creating a cozy play tent structure below. Add string lights, a small bookshelf, and a floor mat to make the under-loft area feel like the most magical reading nook in the world.
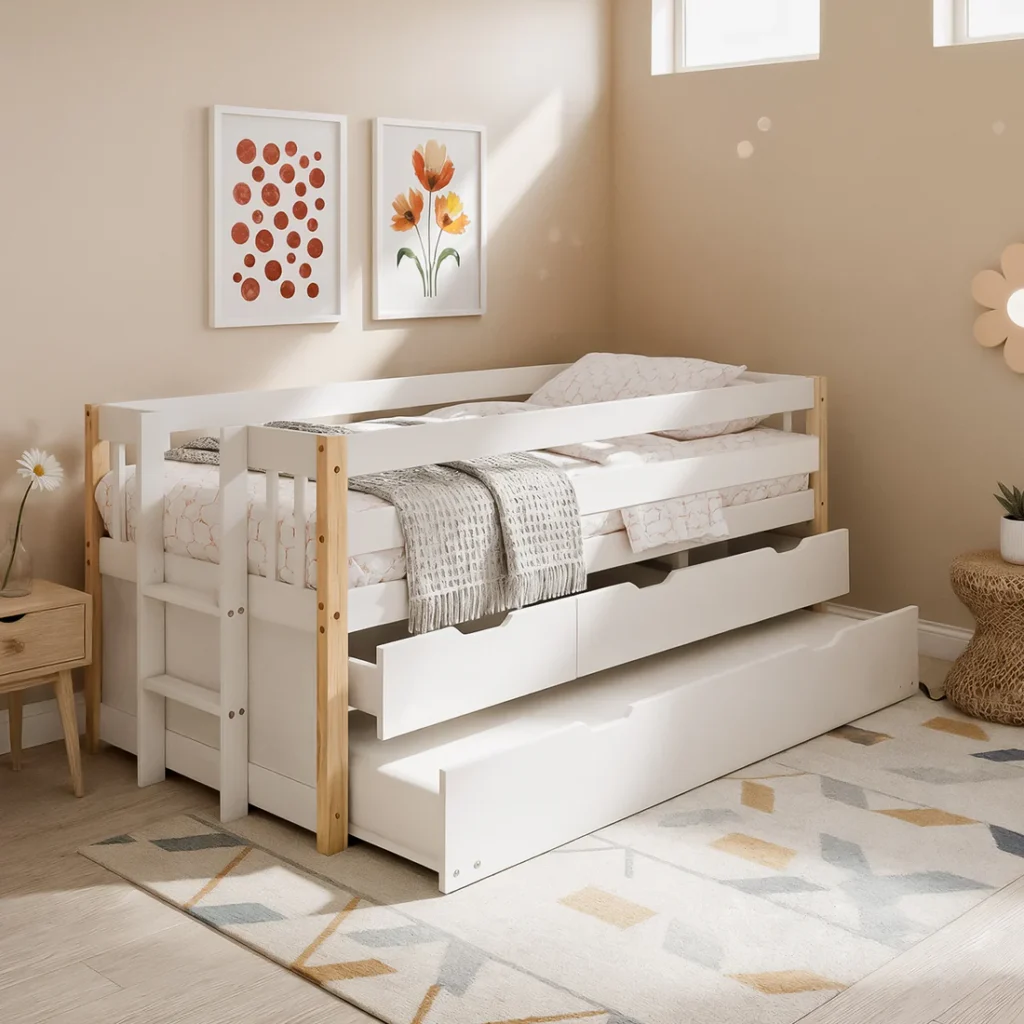
4. Consider Trundle Beds For Flexible Space
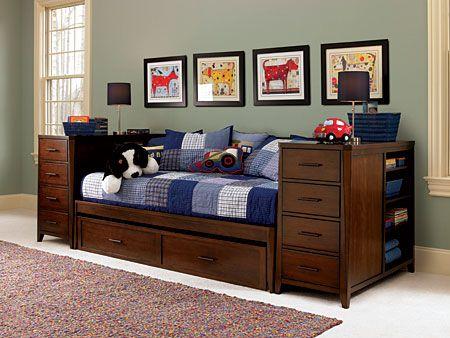
The second bed rolls out at night and disappears during the day, giving kids a wide-open floor for play and movement. This is a huge win in smaller rooms where every square meter counts. Many trundle frames now come with storage drawers built into the pull-out base, so you gain sleeping space and storage in one piece of furniture.
A trundle setup also works beautifully for families where the kids do not always sleep in the same room. The second bed can easily become a sleepover option for friends, making it one of the most versatile sleeping arrangements available for a shared bedroom.
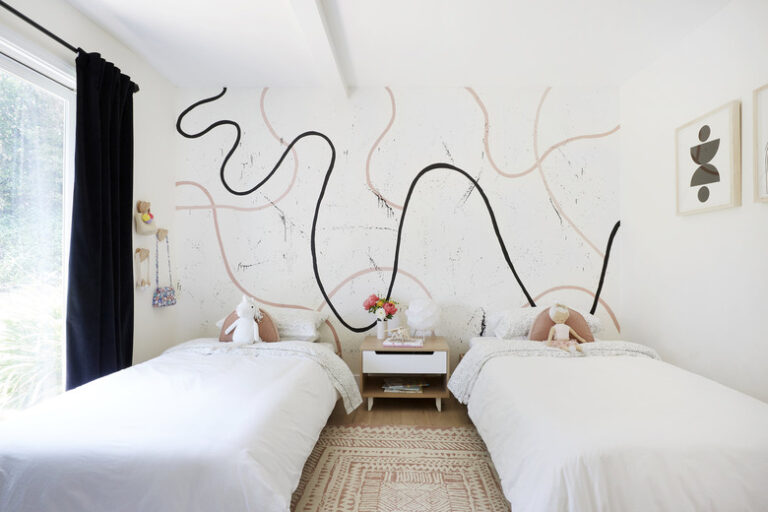
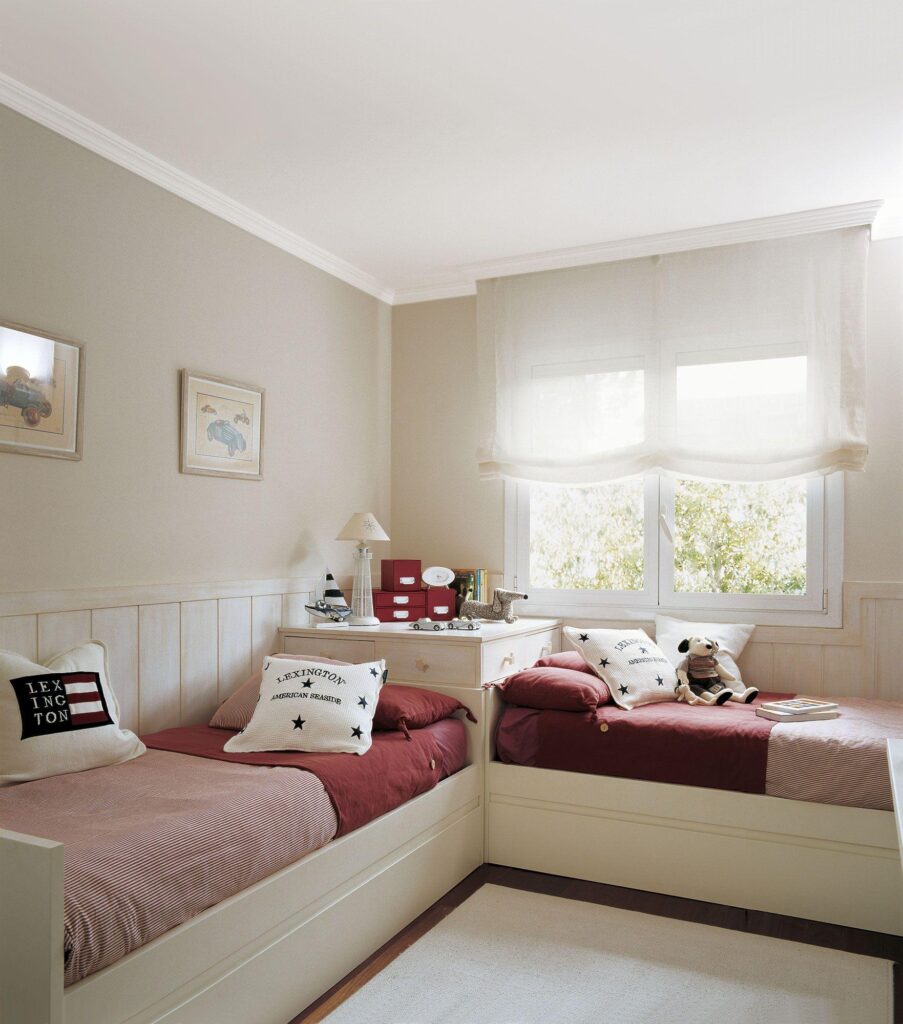
5. Place Beds Foot to Foot
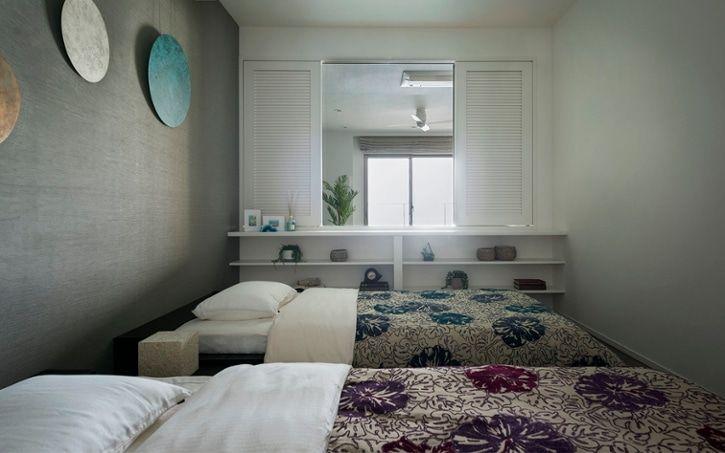
When side-by-side feels too cramped and stacking isn’t an option, pointing beds toward each other frees up wall space on both sides for shelving, art displays, and personalized décor. The gap in the middle can function as a natural aisle or even a small shared bedside zone with a compact nightstand.
This layout is particularly effective in narrow rectangular rooms where parallel placement would leave the room feeling like a corridor. It also makes it easier for parents to access each child’s bed during nighttime routines without climbing over anyone.
Dividing the Room Fairly
6. Hang A Curtain Divider
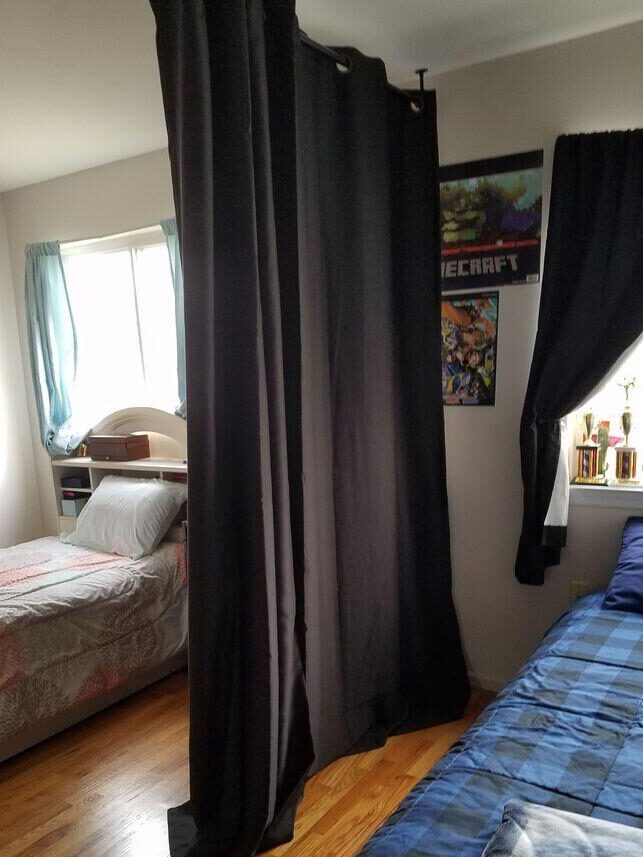
A ceiling-mounted curtain track is one of the most elegant and affordable ways to give each child a private nook. Pull it open during the day for an open, airy feel. Draw it closed at bedtime for privacy and wind-down time. No construction, no permanent changes, and completely reversible if you move or redecorate.
Choose a fabric that complements the overall room palette. A sheer linen curtain keeps things light and soft, while a heavier blackout fabric works well for naptime schedules that differ between a toddler and an older child. Either way, it is a surprisingly sophisticated solution that feels intentional rather than improvised.
7. Use A Bookshelf As A Room Divider
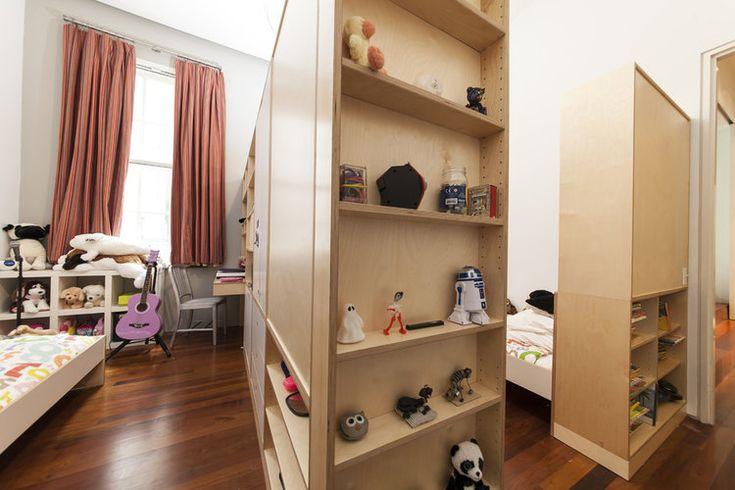
A double-sided bookshelf placed in the center of the room creates a soft visual boundary that doesn’t feel harsh or institutional. Both kids get accessible storage on their respective sides, and the shelf itself becomes a shared resource. Books, games, and art supplies live in the middle, equally available to both.
Look for open-back shelving units so the room still feels connected and light flows through. You can anchor it to the wall for safety and top it with a trailing plant or a row of matching storage baskets to give it a finished, intentional look rather than a makeshift divider feel.
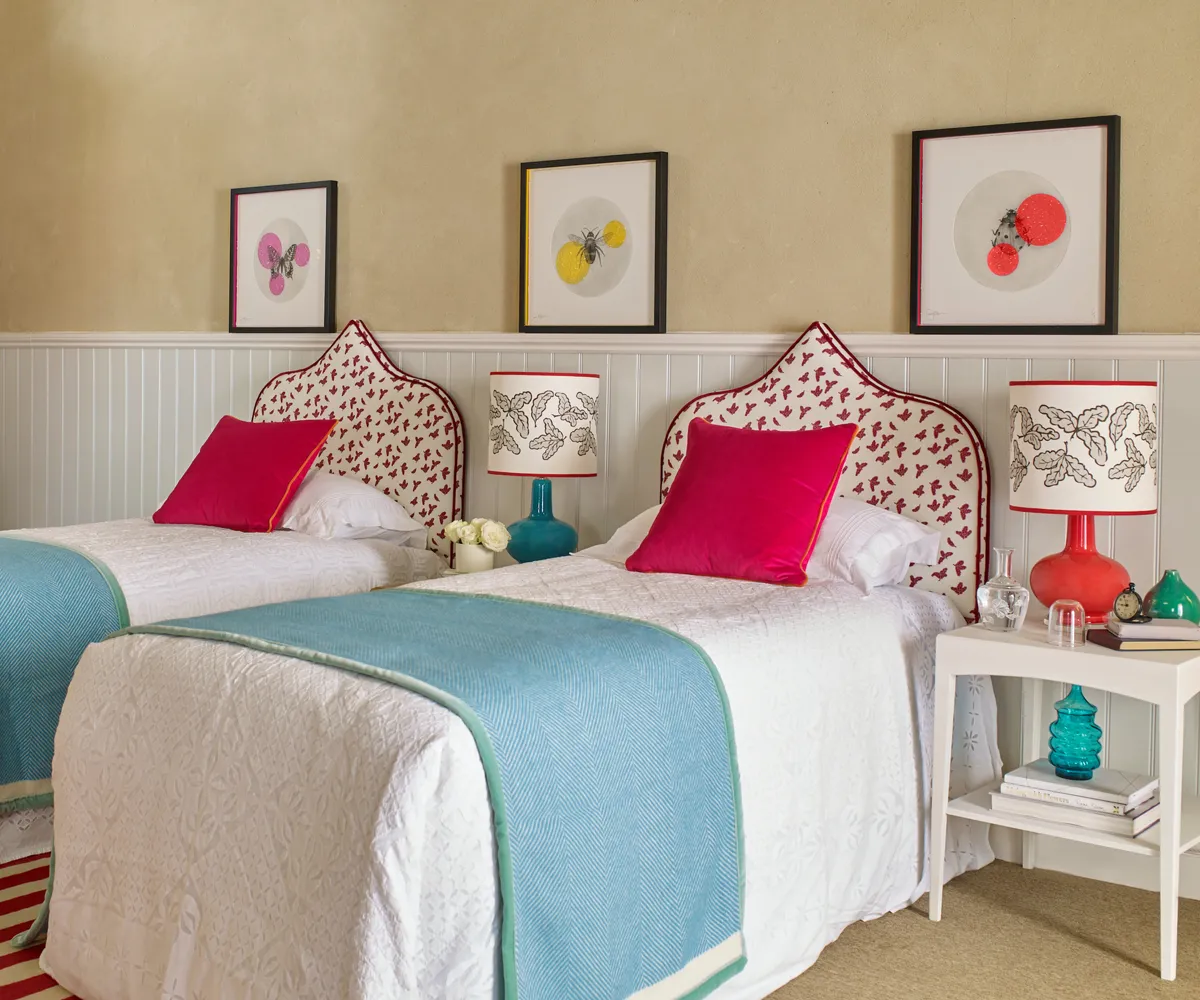
8. Color-code Each Child’s Zone
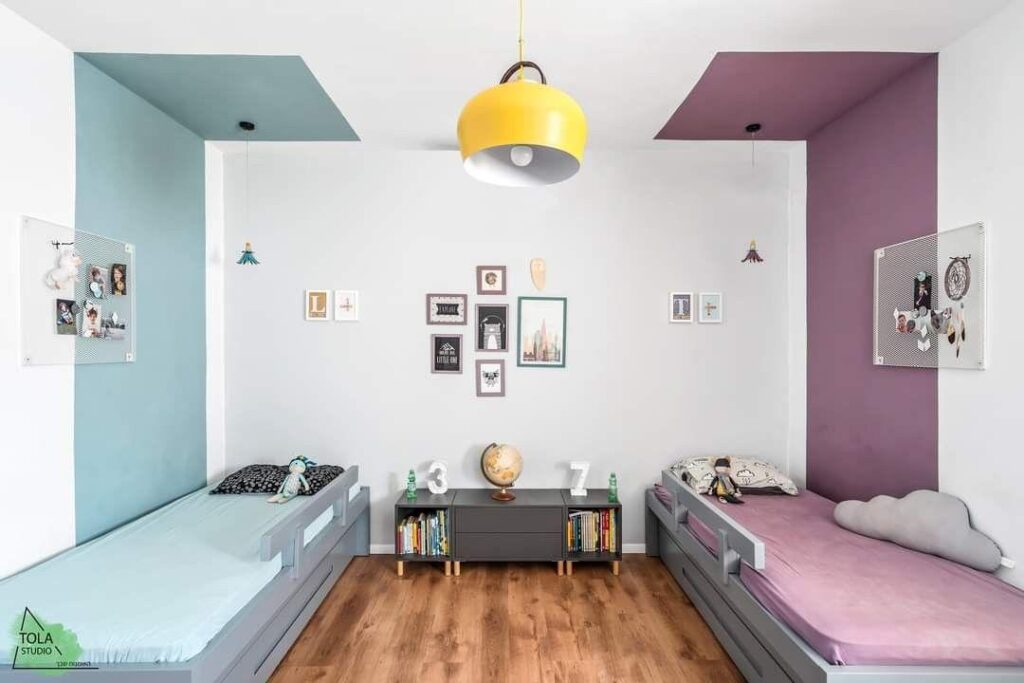
Assign each child a color palette. One gets warm terracotta and blush, the other gets navy and forest green. Apply it through bedding, cushions, and small accessories. The room stays visually cohesive as a whole and each child feels completely seen and celebrated in their own corner.
This is one of the easiest and most cost-effective personalization strategies available because you are working with soft furnishings you would buy anyway. The real magic is in the consistency. When every item in a child’s zone speaks their color language, the room reads as intentionally designed rather than thrown together. It also makes tidying up easier since everything in one color goes back to one side.
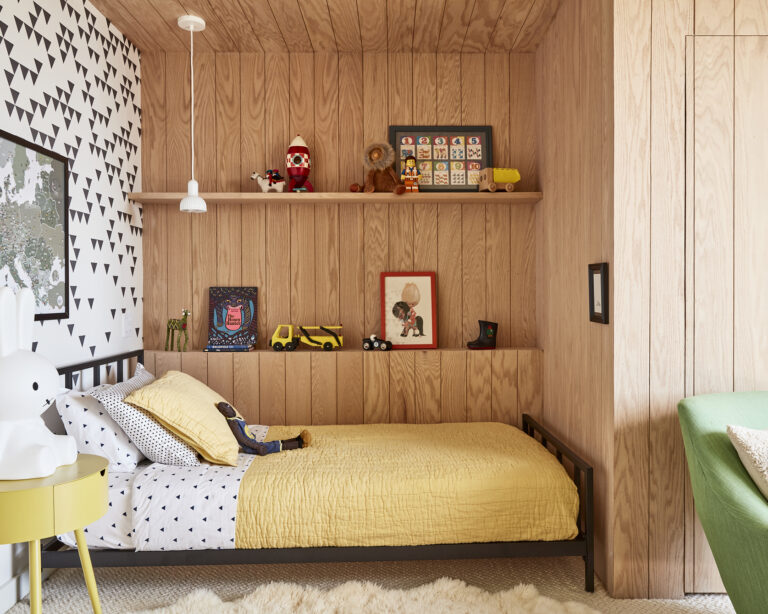
9. Customize Their Own Bedroom Wall
Keep the shared walls neutral. White, warm gray, or soft greige work beautifully. Let each child customize the wall directly behind their own bed. A DIY painted panel, peel-and-stick removable wallpaper, or even a gallery wall built entirely from their own drawings turns each sleep space into a deeply personal expression.
This approach respects both children’s individuality while maintaining room-wide harmony. The neutral shared walls act as a visual buffer so the two accent walls do not clash even if one child is obsessed with rainbows and the other with outer space. It is a brilliant way to let kids feel creative agency without giving them free rein over the entire room.
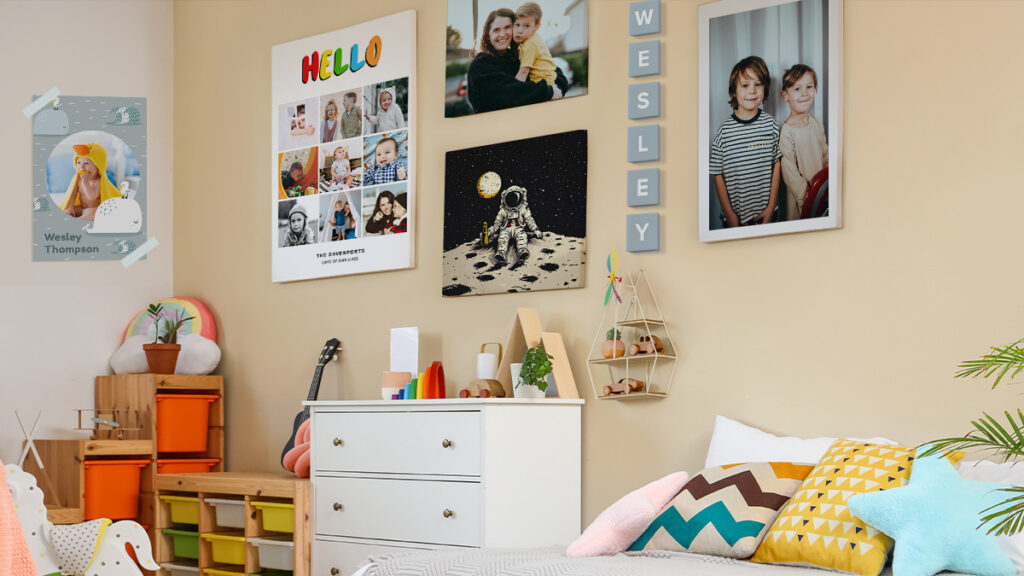
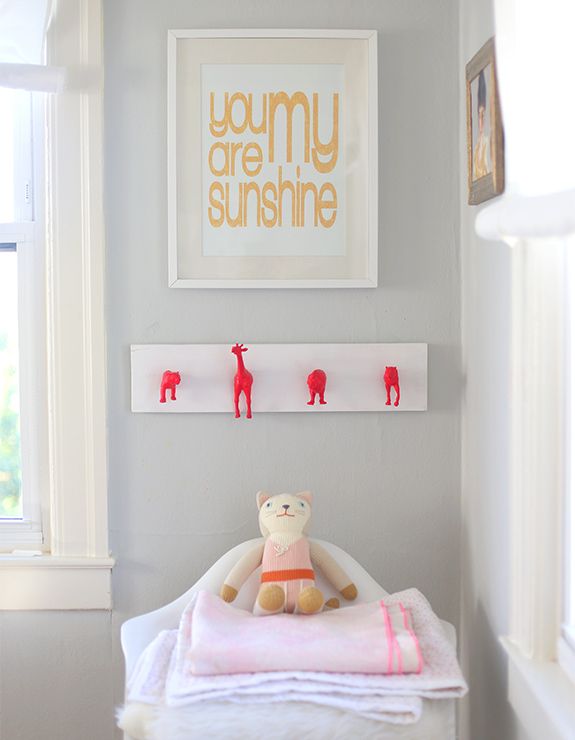
10. Use Personalized Décor Elements
Named wall letters, character pillows, or custom door hangers are small touches that make a surprisingly big emotional difference. When a child sees their name on a hook or their favorite animal on a shelf label, they feel that the space genuinely belongs to them. That sense of ownership translates directly into more responsible behavior.
It does not have to be expensive or elaborate. A simple wooden letter from a craft store, painted in their chosen color, or a printed name tag laminated and stuck to their storage bin does the job perfectly. The goal is not perfection. It is connection.
Storage Systems That Actually Stick
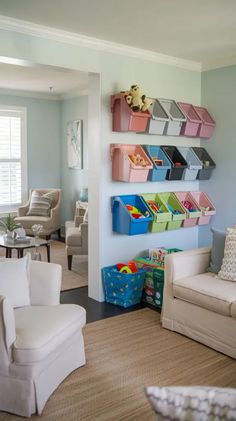
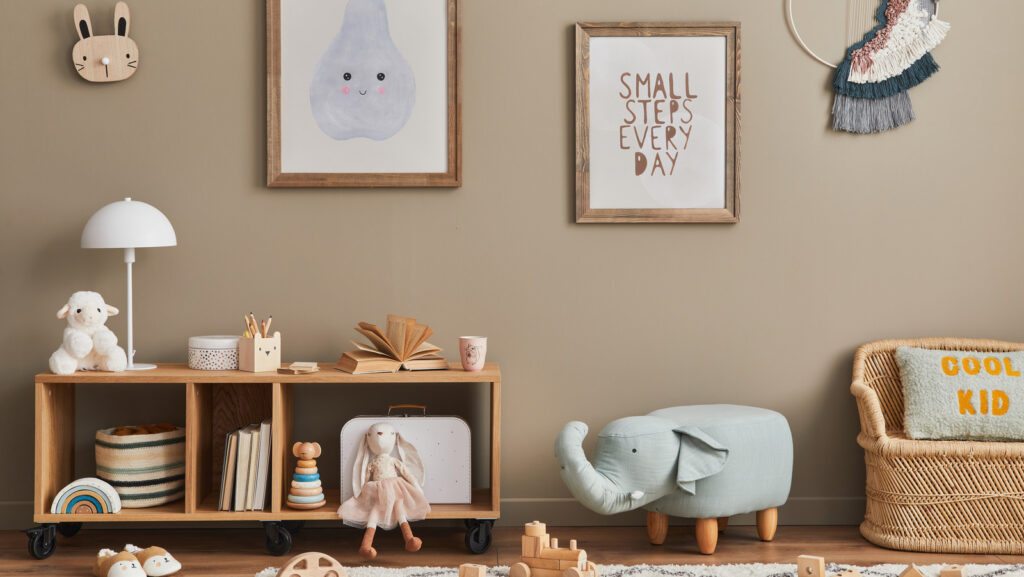
11. Install Vertical Shelf
Tall, narrow shelving units draw the eye upward and use air space that would otherwise sit completely empty. This is especially valuable in shared rooms where floor space is already at a premium. Add woven baskets or fabric bins at lower levels so kids can access and return their own belongings independently with no asking for help and no excuses.
Reserve the upper shelves for items used less frequently, decorative pieces, or things that genuinely need to be out of a younger child’s reach. A consistent vertical storage system also makes the room feel taller and more spacious. It is a visual trick that works in even the smallest shared spaces.
12. Maximize Underbed Storage
Rolling bins, fabric drawer inserts, or built-in platform drawers under each bed are absolute gold in a shared room. Use them for seasonal clothing, extra blankets, or the inevitable toy overflow that accumulates in any multi-child household. Label each bin clearly so kids know exactly what lives where.
Flat, rolling crates with handles are particularly great for younger children because they can pull them out themselves during play and push them back without adult help. That independence is important. When kids can manage their own storage, they are far more likely to actually use it.
13. Go Modular With Stackable Bins
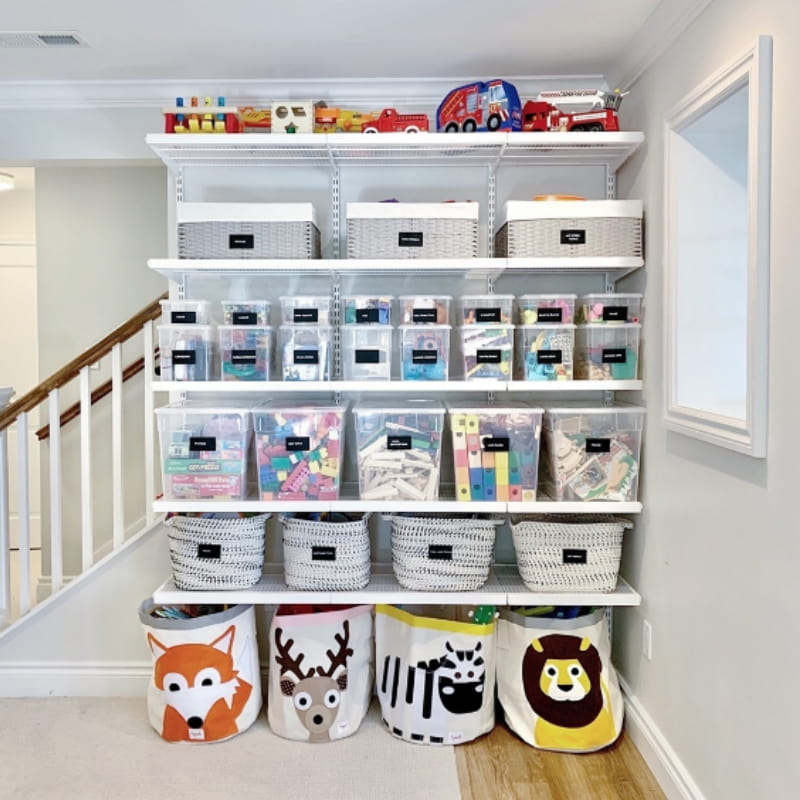
Clear or color-coded modular bins on shelves are endlessly reconfigurable as kids grow and interests evolve. A bin that holds Lego today can hold art supplies next year, and the whole system can be rearranged in an afternoon without buying anything new.
Label them with pictures for younger children and words for older ones. If siblings are at different ages, use both. A small photo of the item plus the word below it works for all ages and keeps everyone on the same organizational system. Consistency matters more than perfection here.
14. Use Headboards With Built-in Storage
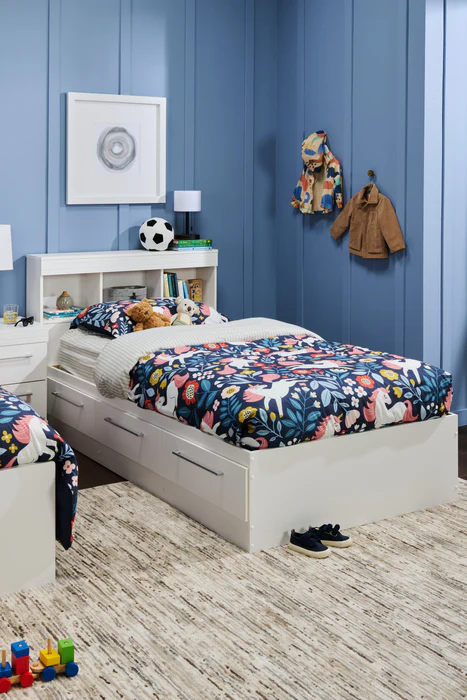
When floor space is too tight for a dresser, a headboard with cubbies, shelves, or fabric pocket organizers solves the bedside storage problem without adding any additional footprint to the room. Books, water bottles, small toys, and nightlights all have a logical home right where kids need them most.
This is particularly effective in rooms with low ceilings where tall furniture feels oppressive. A storage headboard keeps everything functional and accessible at bed level, making bedtime routines smoother and mornings less chaotic. Look for designs with a mix of open shelves and closed compartments for visual balance.
15. Add A Labeled Hook System
A row of wall-mounted hooks, each one assigned to and named for a specific child, keeps backpacks, hats, sports gear, and bags off the floor and in a predictable spot. This single intervention alone can transform the entryway of a shared room from a permanent pile-up into a genuinely functional system.
Use character hooks, painted wooden pegs, or industrial metal hooks depending on the room’s aesthetic. What matters most is the labeling and consistency. When kids know exactly where their stuff belongs and can reach it independently, the hooks actually get used. That is the only kind of storage that counts.
16. Build A Dedicated Toy Zone
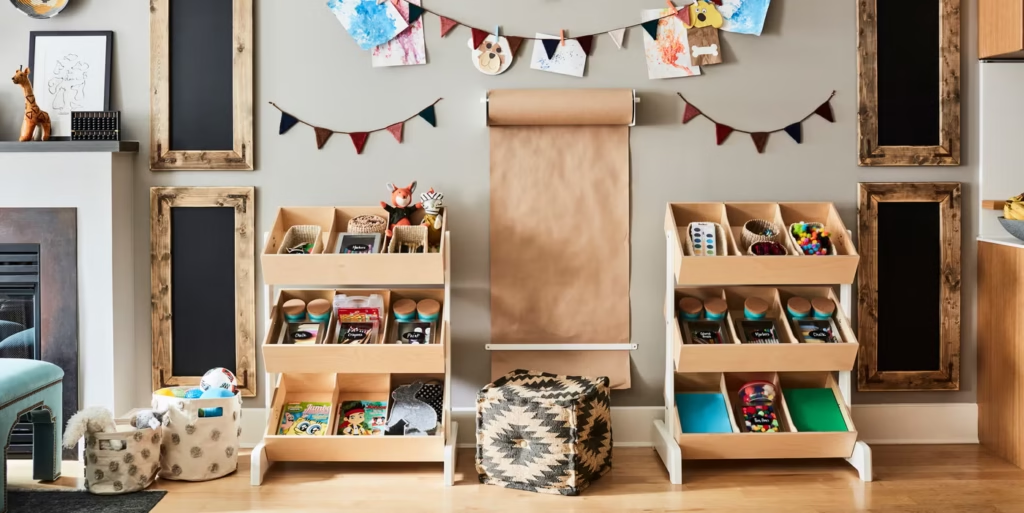
Designate one corner of the room as the play-and-toy area with open low shelves, labeled bins, and a foam play mat. When every toy category has a named home, cars here, blocks there, art supplies in this bin, cleanup stops being a debate and becomes a straightforward matching exercise.
A dedicated toy zone also psychologically separates sleep space from play space, which is genuinely helpful for bedtime transitions. When the toys are contained in one area, kids can mentally switch off more easily when they cross to the sleeping side of the room. It is a small design decision with real behavioral benefits.
Study and Activity Zones
17. Install Fold-down Wall Desks
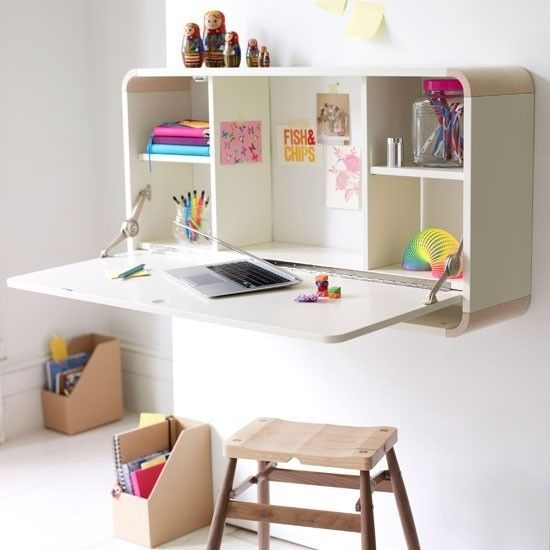
Wall-mounted desks that fold completely flat when not in use are a game-changer for small shared rooms. During homework time they provide a proper, functional workspace. During weekends and holidays they disappear into the wall and give kids back their floor space.
For two children who both need study space, install two fold-down desks side by side or on opposite walls. Add a pegboard above each one for supplies, a small shelf for books, and individual task lighting. The result is a fully functional study station that takes up zero space when school is out.
18. Stagger Toy Storage by Height
If you have an older and younger sibling sharing the room, place age-appropriate toys and items at different heights intentionally. Younger kids’ toys, stuffed animals, and picture books go on the lower, accessible shelves. Older children’s items, especially anything with small parts, collectibles, or hobby supplies, go on higher shelves or in closed storage the younger child cannot reach.
This simple height-based system reduces conflict dramatically, keeps younger children safer, and makes the older sibling feel that their belongings are genuinely respected and protected. It also makes it easy for parents to quickly audit what is accessible to whom during room tidying.
19. Create A Shared Creative Corner
A low table, a rotating art supply caddy, and a pegboard for displaying current masterpieces gives both kids a joint space to create together. This corner becomes a natural collaboration zone. A place where the shared room actually benefits from having two occupants rather than feeling like a compromise.
Keep the supplies organized by category in clear jars or labeled cups. Pencils together, markers together, scissors in one spot. Rotate the display on the pegboard every few weeks so both children’s work gets featured. This small ritual of recognition does wonders for sibling relationships and creative confidence alike.
Décor That Brings It All Together
20. Choose Neutral Walls with Bold Accents
Soft gray, warm white, or greige walls act as a calm, flexible backdrop that lets each child’s personality shine through accents like rugs, cushions, art, and throws without competing visually. The neutral base also means the room will not feel dated in two years when interests inevitably shift.
Bold accents are easy and inexpensive to swap out. A new throw pillow, a different rug, a fresh set of wall decals. These small changes can completely refresh a room’s energy without repainting or replacing furniture. Neutrals are the ultimate long-game strategy in a kids’ shared bedroom.
21. Use Removable Wall Decals And Murals
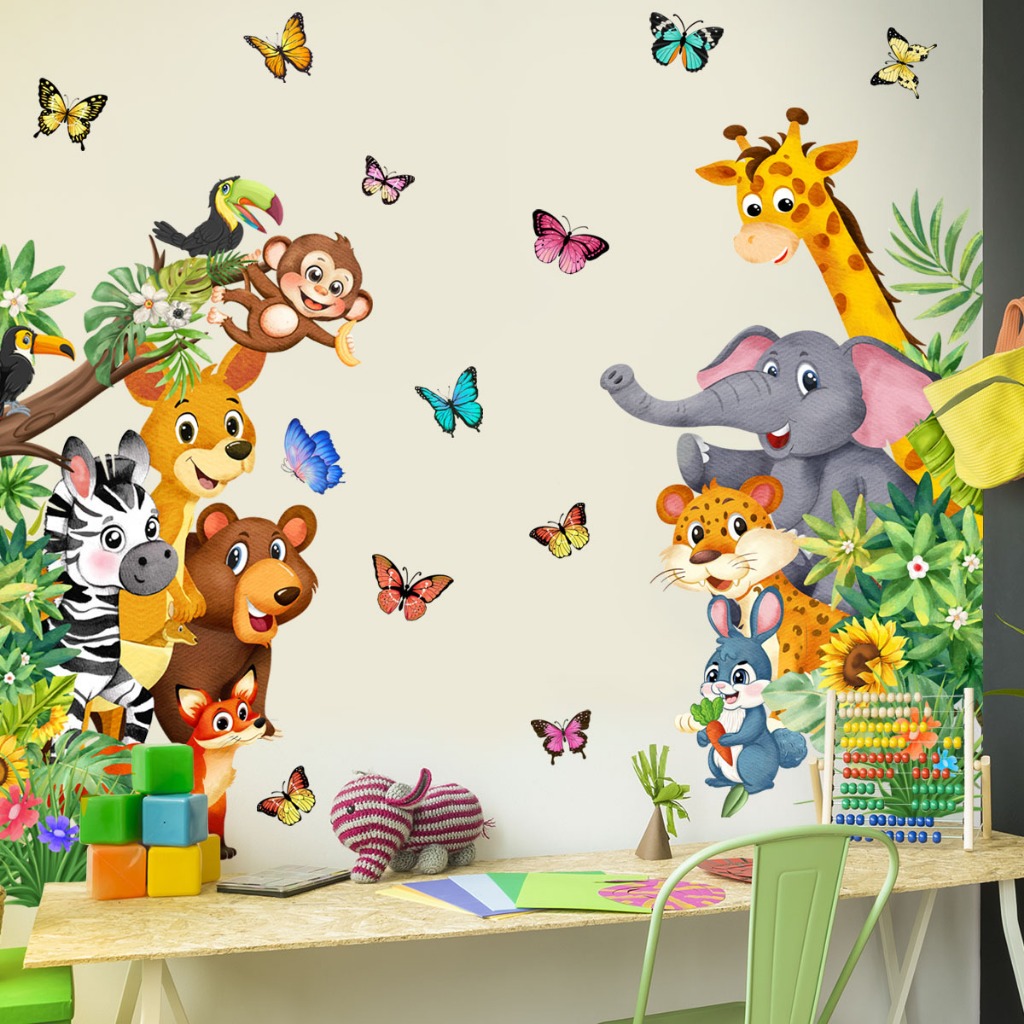
Kids’ interests change fast, sometimes season to season. Removable decals mean you can swap a dinosaur forest scene for a galaxy mural in a single afternoon with no paint, no fuss, no regrets, and no damage to the walls. Many brands now offer incredibly realistic, high-quality murals in peel-and-stick format that look indistinguishable from painted art.
Let each child choose a decal for their side of the room and refresh it annually as a small ritual. It gives them real creative input in how their space looks and builds genuine excitement about their bedroom. The process of choosing and applying it together can itself become a fun family activity.
22. Layered And Adjustable Lighting
Shared rooms need real lighting flexibility. A main overhead light covers general use while individual bedside reading lights, with clip-ons working brilliantly on bunk beds, let each child read independently without disturbing the other. Add an optional nightlight near the door for nighttime trips to the bathroom.
Smart bulbs that dim with a voice command or a phone tap are worth the small investment here. When one child is a night owl and the other falls asleep early, the ability to dim the room gradually without getting up makes bedtime infinitely smoother. Lighting is often the last thing parents think about in a shared room but it has an outsized impact on daily harmony.
23. Invest In Stain Resistant Fabrics
Stain-resistant bedding, machine-washable rugs, and wipeable storage bins mean the room can survive everyday kid life. Spilled juice, muddy hands, marker accidents, none of it requires a constant deep clean. Durability is a form of organization. When everything in the room is easy to maintain, the room stays organized longer with less effort.
Look for bedding that balances softness with durability. Microfiber and performance cotton blends hold up well to frequent washing. For rugs, flatweave or low-pile options are far easier to clean than plush styles. These are not glamorous choices, but they are the ones that make a shared kids room genuinely liveable for years.
The Rule That Ties It All Together
No matter which of these ideas you implement, the single most important principle is this. Give each child a genuine sense of ownership over their corner of the room. When kids feel that a space belongs to them, even partially, they naturally take more pride in keeping it organized. Conflicts decrease. Creativity increases. And the room becomes a place both children actually love coming back to.
Start with one or two changes. Sleeping layout and a labeling system are the highest-impact first steps. Then build from there. You do not have to do everything at once. A shared room evolves beautifully over time, just like the kids living in it.
Have a shared kids room tip that worked brilliantly for your family? Drop it in the comments. We would love to add it to the list.